Certified On-Site Insulation Inspection: Detect Gaps & Air Leakage
Homeowners often overlook insulation until energy bills spike or indoor comfort drops. A thorough insulation inspection is one of the most effective ways to identify the root cause of energy loss in any residential or commercial property. Scheduling a professional on-site insulation inspection allows experts to assess every corner of your building — from attic to crawlspace — to pinpoint gaps, air leaks, and thermal deficiencies before they escalate into costly problems. In Kansas City and surrounding regions, where seasonal temperature extremes can swing dramatically, maintaining well-performing insulation is not optional — it is a necessity.
Why Insulation Fails Over Time
Insulation doesn’t last forever. Even the best-installed materials deteriorate, compress, or shift over the years due to moisture intrusion, pest activity, structural settling, and renovation disturbances. Batt insulation can sag out of place, blown-in insulation can compress over time reducing its R-value, and spray foam can develop cracks along edges and seams. In many cases, insulation is removed during plumbing or electrical work and never properly replaced, leaving critical sections of the building envelope completely exposed.
Air movement is another major culprit. When warm air finds a gap in your building’s envelope, it carries moisture with it — leading to condensation, mold growth, and further degradation of insulation material. This cycle of thermal loss and moisture damage accelerates structural wear while dramatically increasing heating and cooling costs. The only reliable way to break this cycle is through a professional, systematic inspection.
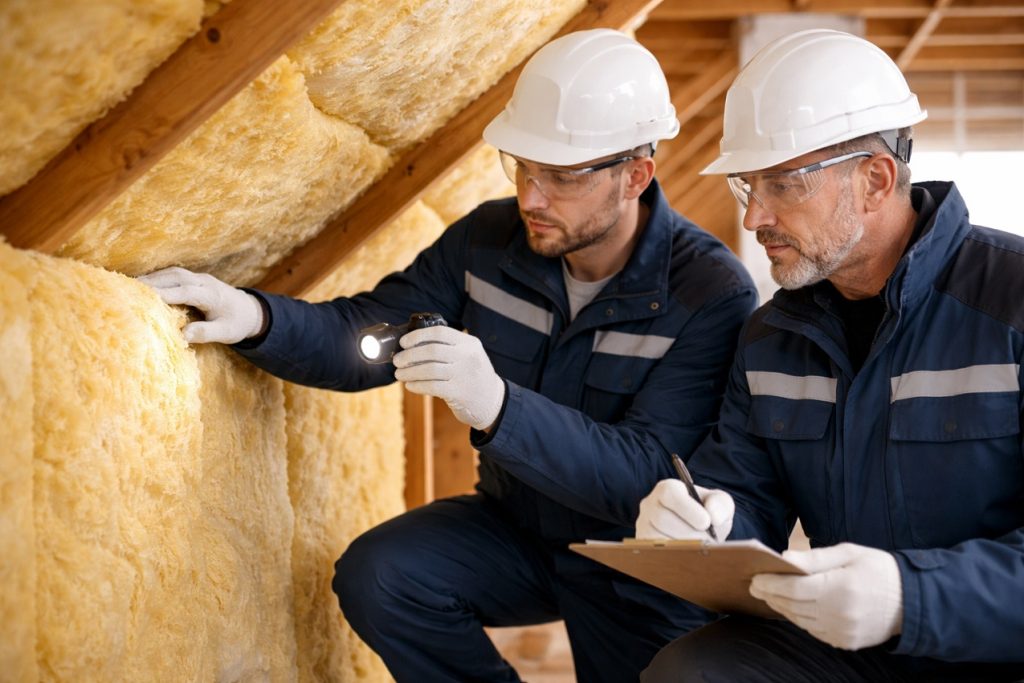
What Happens During an On-Site Inspection
A qualified inspector follows a methodical process that covers all major areas of the property. The inspection is never limited to a single zone — it encompasses the full building envelope, from the roofline down to the foundation. Here is what a comprehensive on-site insulation inspection typically includes:
- Attic Inspection: Inspectors evaluate insulation depth, type, and distribution across the attic floor. They check for compressed or missing sections, verify R-value compliance with local energy codes, and assess attic ventilation to prevent heat buildup and moisture accumulation.
- Wall Cavity Assessment: Using thermal imaging and outlet probe tests, inspectors determine whether wall cavities are properly filled. Missing insulation in wall bays is one of the most common yet invisible energy deficiencies in older homes.
- Crawlspace and Basement Evaluation: These areas are highly susceptible to moisture infiltration and cold air intrusion. Inspectors examine vapor barriers, insulation coverage on rim joists and band joists, and any signs of water damage or mold growth.
- HVAC Duct Inspection: Poorly insulated or uninsulated ductwork running through unconditioned spaces can be responsible for 20–30% of total heating and cooling energy loss. Inspectors check duct seams, joints, and insulation wrap conditions.
- Window and Door Perimeters: Gaps around frames are a primary source of air leakage. Inspectors look for failed caulk, missing weatherstripping, and thermal bridging along window and door surrounds.
Advanced Air Leakage Detection Methods
Detecting air leakage requires more than a visual walkthrough. Modern insulation inspection professionals use a combination of diagnostic tools to identify hidden problem areas with precision.
Infrared Thermal Imaging is one of the most powerful tools available. A thermal camera detects temperature variations across surfaces, revealing cold spots, warm intrusions, and areas of missing insulation that would otherwise be completely invisible to the naked eye. For best results, thermal imaging is performed when there is at least a 20-degree temperature differential between the interior and exterior of the building.
Blower Door Testing is another industry-standard technique. A powerful calibrated fan is mounted in an exterior door frame and used to depressurize the building interior. This pressure difference forces air through every gap, crack, and penetration in the building envelope — making leaks detectable via smoke pencils, thermal cameras, or even by hand. Blower door testing provides quantifiable airtightness data and helps inspectors prioritize which areas require immediate sealing.
Smoke Pencils and Draft Detection: For smaller, localized leaks around electrical outlets, pipe penetrations, recessed lighting fixtures, and baseboards, smoke pencils and infrared thermometers allow inspectors to trace airflow in real time.
Common Problem Areas Found During Inspections
Across thousands of residential inspections, certain locations consistently reveal insulation gaps and air leakage. Knowing where to look makes the inspection process faster and more targeted:
- Attic hatch and pull-down stairs: These areas are rarely insulated adequately and represent a significant source of heat loss.
- Recessed lighting fixtures: Old-style recessed cans penetrate the ceiling and allow air to freely flow between conditioned and unconditioned spaces.
- Plumbing and electrical penetrations: Every pipe, conduit, and wire that passes through walls, floors, or ceilings creates a potential air pathway if not properly sealed with caulk or expanding foam.
- Rim joists and band joists: Located where the floor framing meets the foundation wall, these are among the most overlooked yet leakiest areas in any home.
- Garage-to-living-space walls: Uninsulated or under-insulated walls between an attached garage and living areas can allow significant heat transfer and even carbon monoxide infiltration.
The Role of R-Value in Inspection Results
Every insulation inspection includes an assessment of current R-values — the measure of thermal resistance — compared to local building code requirements and ENERGY STAR recommendations. In Kansas City’s climate zone, attic insulation is typically recommended at R-49 to R-60, while wall insulation should meet a minimum of R-13 to R-20. If existing insulation falls below these thresholds, an inspector will recommend targeted upgrades to bring the home into compliance and optimize energy performance.
Taking Action after the Inspection
Once an inspection report is complete, homeowners receive a detailed breakdown of problem areas ranked by severity and energy impact. Recommended remediation typically includes air sealing with caulk, expanding foam, or weatherstripping before any new insulation is added. Addressing air leaks first ensures that new insulation performs at its rated R-value rather than being undermined by continuous air movement.
A professional on-site insulation inspection is the smartest first step any homeowner can take toward lower energy bills, improved indoor air quality, and a more comfortable living environment year-round. Don’t wait for the next extreme weather season to discover what your insulation is hiding.