How to Overlay a Picture on a Video in CapCut 2025
Overlaying a picture on a video can take your content to the next level, adding a professional and creative touch that engages your viewers. Whether you’re a beginner or an experienced video editor, CapCut provides an easy way to enhance your videos with stunning visual overlays. With its simple interface, you can create videos that stand out, impress your audience, and make your social media content pop.
You might feel overwhelmed when starting video editing, but don’t worry—CapCut makes this process incredibly easy. Many creators and businesses trust CapCut because it offers intuitive tools that help even novices add dynamic effects to their videos. With a little guidance, you’ll feel confident overlaying pictures and bringing your vision to life, just like experienced editors do.
By following this step-by-step guide, you’ll learn how to overlay pictures seamlessly and use CapCut’s features to their full potential. You’ll not only gain hands-on skills but also understand how these techniques can make your content more engaging and shareable. We’re here to give you clear, practical instructions, with no fluff, just actionable tips to enhance your videos in 2025 and beyond.
Why Overlay Pictures on Videos in CapCut?
Overlaying pictures on videos in CapCut APK can significantly boost the visual appeal of your content. Whether you’re making a tutorial, a promotional video, or a personal vlog, adding images helps convey your message more effectively. CapCut allows you to layer images directly on top of videos, making it easy to highlight key details, showcase products, or create dynamic visual effects without the need for advanced editing skills.
Not only does overlaying pictures make your videos look more polished, but it also enhances user engagement. Viewers are more likely to stay engaged when the video has visual interest, and CapCut’s simple yet powerful editing tools help you achieve this. With features like resizing, positioning, and even animation, CapCut ensures your overlays look seamless and professional, helping you stand out in a crowded content space.
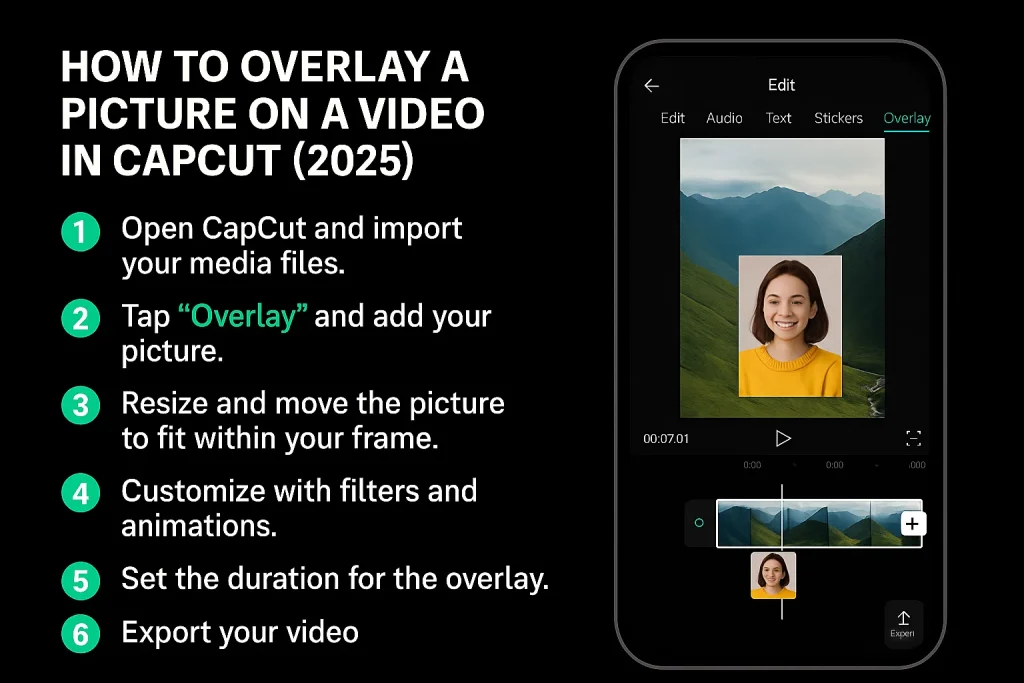
How to Overlay a Picture on a Video in CapCut (2025)
1. Getting Started: Opening CapCut and Importing Your Media
To begin, open CapCut on your device and create a new project by selecting the “New Project” button. Once you’re in the project, tap the “+” icon to import your video and the image you want to overlay. Simply choose your video from your gallery, and then pick the image you’d like to add. Both files will be imported into your project, ready for editing.
2. Adding a Picture Overlay to Your Video
Now that your media is imported, tap on the “Overlay” option from the toolbar at the bottom. Select “Add Overlay” and choose the image you want to add to your video. The image will appear as a new layer above your video track, and you’ll be able to adjust it throughout your project.
3. Adjusting the Size and Position of the Overlay
To resize and position your image, tap on the overlay and drag the corners to adjust the size. You can move the picture around the screen by dragging it with your fingers or cursor. Make sure the image fits the video frame the way you want it, whether it’s in the center, corner, or any other spot.
4. Customizing the Overlay: Using Filters, Animations, and Effects
CapCut provides powerful customization features for overlays. You can enhance your picture by adding filters, animations, or effects from the toolbar. If you want the image to fade in, zoom, or rotate, you can apply keyframe animations, or experiment with blending modes for unique effects that make your picture blend seamlessly with the video.
5. Setting the Duration of the Picture Overlay
Next, adjust how long the overlay image stays visible in your video. Tap on the image in the timeline and drag its edges to set the duration. You can make the image appear for a few seconds or have it last the entire video, depending on your needs.
6. Finalizing Your Video: Exporting and Saving
Once you’re satisfied with your picture overlay, it’s time to export your final video. Tap on the “Export” button in the top right corner, choose your video quality, and then save it to your device. Your edited video with the picture overlay is now ready to share with your audience!
Related:
- How to Record Screen Using CapCut?
- How to Remove Alight Motion Watermark on CapCut?
- How to Blur a Face in CapCut – A Simple Guide
- How to Stabilize a Video in CapCut: A Step-by-Step Guide
Additional Tips and Tricks for Using Overlays in CapCut
- To take your editing to the next level, you can add multiple overlays in CapCut. Simply tap on the “Overlay” option again and select “Add Overlay” to layer additional images or videos. This allows you to create more complex visuals, like picture-in-picture effects or dynamic split screens, for a more polished look.
- Keyframes are a great way to control the precise movement of your overlays. By setting keyframes at different points along the timeline, you can animate the image or video. For example, you could make the image move across the screen or gradually change its size. This technique is perfect for creating smooth, dynamic transitions and adding more professional touches to your project.
- Blending modes let you combine images or videos in creative ways. By adjusting the blending mode of an overlay, you can change how the image interacts with the video beneath it. This can create interesting visual effects like a soft fade, vibrant color blend, or even a unique artistic look. Experiment with different modes to find the one that suits your video best!
Conclusion
In this guide, we’ve covered everything you need to know about overlaying a picture on a video in CapCut. From starting a new project to importing your media, adjusting overlays, and customizing them with animations and effects, we’ve walked through each step to help you create professional-looking videos with ease. Whether you’re a beginner or looking to improve your skills, CapCut offers the tools to make your content stand out.
CapCut is a user-friendly yet powerful editing tool that opens up endless creative possibilities. The ability to overlay pictures, use keyframes for animation, and experiment with blending modes allows you to add unique touches to your videos. Whether you’re making content for social media or personal projects, these features can truly elevate your work.
If you found this guide helpful, feel free to share it with others! If you have any questions or run into issues while editing, don’t hesitate to drop a comment below or reach out to CapCut’s support team for assistance. We’re here to help you every step of the way!